Thursday, April 30, 2015

Mystery Bugiardini Portrait

This portrait attributed to a follower of  Giuliano Bugiardini may in fact be a lost Raphael.


Giuliano-Bugiardini-lady
Image from:  https://news.artnet.com/in-brief/mystery-portrait-may-be-a-lost-raphael-39806

Full story at https://news.artnet.com/in-brief/mystery-portrait-may-be-a-lost-raphael-39806

Wednesday, April 29, 2015

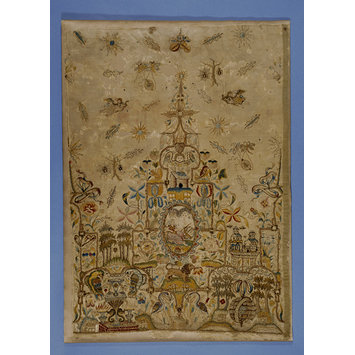
Embroidered Petticoat Panels

Some inspiration for a future embroidery project:


Petticoat panel
Embroidered petticoat panel c 1600, V&A Museum
Item Number T.138-1981
from: http://collections.vam.ac.uk/item/O85436/petticoat-panel-unknown/

Tuesday, April 28, 2015

Red floral collar and cuff set

Here is another one of the projects that I worked on for friends. This time it is a maroon floral embroidery design on linen.


The pattern book that I used for this design. It is an excellent reference for band patterns.


Plate 13 from 1527, showing the pattern that I adapted on the left

This design was executed in double running stitch, with two strands of DMC cotton floss. I have done this design before on a partlet in black and gold, (see entry for Collarless Italian Partlet, January 2012) but I like the monochrome effect much more.

My favourite part of the process! Rinsing the  finished embroidery and the design looks so bright and fresh!


The completed design. These pieces took approximately fifty hours to work, including drawing and tracing the designs.


The finished pieces ironed and waiting to be made into collar and cuffs.


Portrait of a young Woman, Albrecht Altdorfer
The design reminded me a bit of the embroidery on the chemise of Aldorfer's Young Woman (in Portrait of a Young Woman). It is conceivable that we used the same pattern!
Image from: http://www.museothyssen.org/en/thyssen/ficha_obra/814

Monday, April 27, 2015

New Renaissance Bling!

What a great week for Renaissance bling! My talented friend Gabriel at Flashes of Flattery (http://flashesofflattery.blogspot.com.au/) made me this lovely Elizabethan necklace out of seed beads:


 And I picked this pretty necklace up from a thrift shop for $4. The pearls are just plastic, and a bit discoloured, but I like the colour theme. I cleaned the beads, and re-strung them on tiger tail.

Monday, April 20, 2015

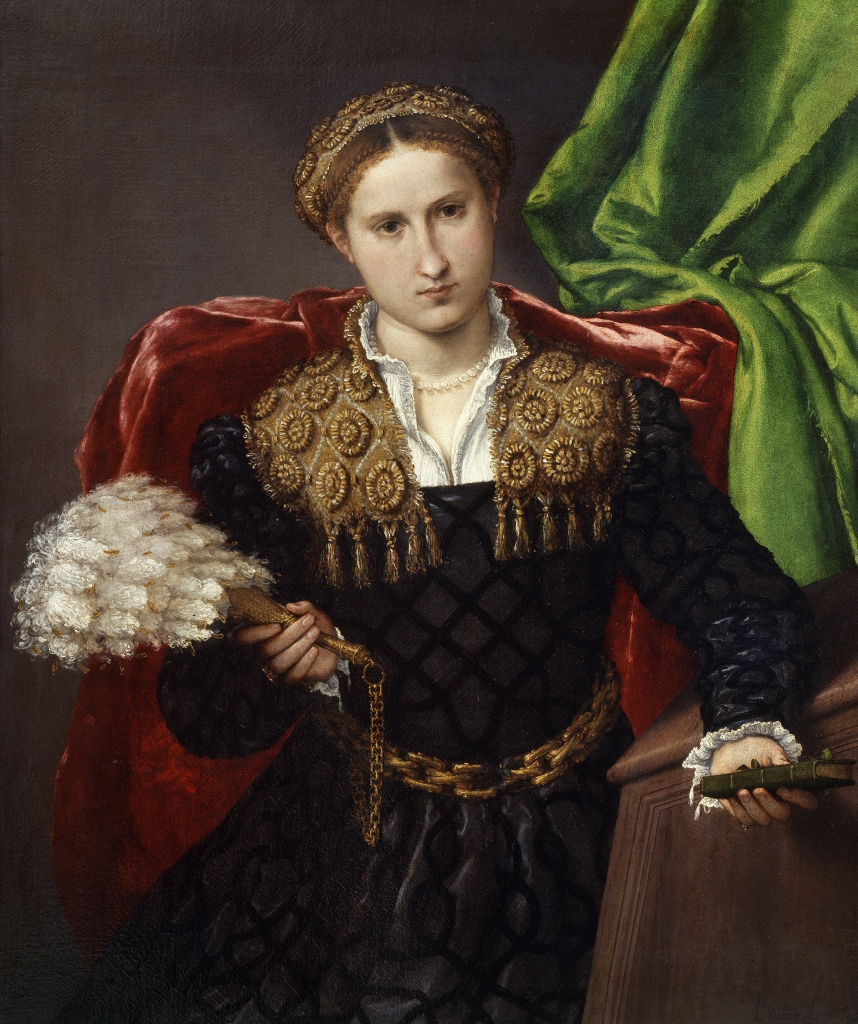
Simple Gold Chain Girdle


A very simple gold chain girdle, made from a very strong metal chain with a lobster clasp.


Venetian Lovers - Paris Bordogne
Image from: https://www.wga.hu/html_m/b/bordone/venlover.html


Portrait of a Lady

Portrait of a Lady - Licinio
Image from: https://www.artuk.org/discover/artworks/portrait-of-a-lady-28713
Related image


Portrait of Laura da Pola - Lorenzo Lotto
Image from: https://pinacotecabrera.org/en/collezione-online/opere/portrait-of-laura-da-pola/

Saturday, April 18, 2015

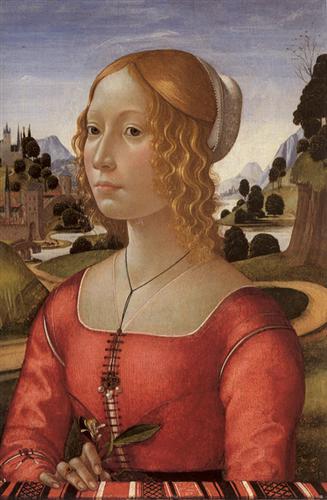
Beaded Italian Necklace

Simple string, cord and beaded necklaces seem to be fairly popular in Italy in the fifteenth century, so I decided to make one to go with this style of dress.


Portrait of Giovanna Tornabuoni by Ghirlandaio
Image from: http://ganino.com/_media/artists:domenico_ghirlandaio1449-1494:ghirlandaio13.jpg


Domenico Ghirlandaio, Birth of St. John the Baptist (1486-1490)
Image from: http://ganino.com/_media/artists:domenico_ghirlandaio1449-1494:ghirlandaio2.jpg


Portrait of a Lady - Domenico Ghirlandaio
Ghirlandaio's Portrait of a Lady
Image from: http://www.wikiart.org/en/domenico-ghirlandaio/portrait-of-a-lady

I made my necklace as a single strand of beads which then splits into two after being separated by a larger blue sunstone bead.
The blue glass seed beads (4mm) were strung onto tiger tail. A crimp was used at the bottom to secure the beads. After the bigger sunstone bead, the single strand splits to become two separate strands. They are finished with crimps and silver fastenings.


I am thinking of making another necklace in a similar style, but with two strands at the bottom, and maybe one in thin lucet or fingerwoven cord.

Friday, April 17, 2015

Red and Black Beaded Necklace and Earring Set


I recently picked these necklaces up at a thrift shop. You may recognise the bottom one- I got another one like it at a junk shop last year and made it into a Venetian necklace-brooch set: http://broidermebethan.blogspot.com.au/2015/02/venetian-necklace-and-brooch-set.html
I planned to do a similar thing, and replace the tiger eye stone with another gemstone. No luck though; I couldn't remove the tiger eye without ruining the setting. Instead I painted the stone with red nail enamel.

 I had these red cut glass and black gemstone beads in stash, and I threaded them onto tiger tail with some gold crimps as spacers.

 I removed the chain from the pendant, and hot glued a brooch back to it. I added a jump ring at the bottom to attach the ends of the necklace to.

The completed set.


The necklace is meant to be worn in this style:


Paolo Caliari Veronese Portrait of a Woman
Paolo Caliari Veronese - Portrait of a Woman
Image from: http://starlightmasquerade.com/PortraitGallery/Ladder-Laced-Venetian/inspiration-pages/Venetian2.htm


I am considering adding a drop pearl at the bottom of the brooch where the ends of the necklace join it.


I also picked these earrings up at a thrift shop last year. The black stone matched the necklace, so I painted the diamante with red and black nail enamel to make a dark red accent.


Thursday, April 16, 2015

Thrift Store Ring Conversion

I have had a lung problem for a few weeks, so I haven't been up to doing anything much. I have worked a little on accessories - they are fun and quick to make, and provide a big impact.

I found this old ring at a thrift store for $3.25. I bought it, took it home, and cut the ring part off. I smoothed the soft metal with my snips, and roughed up the back area. Then I used hot glue to glue a brooch back on. Voila! A new brooch.


The old ring


Finished and ready to wear


Saturday, April 11, 2015

War Cloak Panels

In the last couple of months I have been honoured to be involved in working some motifs for a War Cloak which was designed by my talented Baroness and presented on behalf of my Barony. This project involved a steep learning curve as I had to learn new skills and techniques with the pressure of a rapidly approaching deadline.

The theme of the project was gold and treasure and I supplemented the beautifully worked pieces done by Countess Sir Eva von Danzig (embroidery on the apples and fleece, appliqué and couching of the sun in splendor) with a golden grail, golden spurs and golden owl. I also added the filler motifs.


There are a variety of metallic gold threads and purl that have been couched down. The black cotton has been worked in split stitch. There are also metal findings and gold Madeira silk.


The end result is beautifully shiny and sparkling, and I am now a bit addicted to goldwork. I plan to learn more about it in the future and develop my skills in this area.


My favourite motif was the adorable little Golden Fleece worked by Countess Sir Eva:


She also worked the beautiful Golden Apples and conceived of, designed and created the cloak. She was assisted by Viscountess Ingerith Ryzka who patiently couched gold on the lettering. Materials were also donated by Mistress Ingerith and Lady Ursula von Memmingen.
The cloak was presented by the Crown to Master Hanbal al-Barbari for his heroic efforts in leading the Kahn’s army at Rowany Festival 2015

I hope to have some pictures of the completed cloak to show soon!

Monday, April 6, 2015

Italian Padded Roll with Seed Beads

I really enjoy making garb-related accessories, because they provide such impact for an outfit, and are usually relatively fast to make (well, compared to gowns, anyway!) So when the Italian Renaissance headwear mini-challenge a few months ago was announced, I was very pleased. I decided to make a padded roll style hat to go with my earlier Italian gowns. I have a balzo, but it is quite big and heavy, so I thought a padded roll would be better for warmer weather.
I found this image on Pinterest. Unfortunately, I couldn't trace the source of the image. The hat is blue with white beads.

I found a damask table runner on special for $2, and decided that this would be the basis of my hat. 

I trimmed it to a rectangle in a size to fit my head, and sewed it into a tube. I then turned the fabric right side out and stuffed it with polyfill. In period, stufffing options would probably have included down, bombast, sawdust, wool or rags/fabric offcuts. I like the polyfill because it is light, cheap and easy to obtain.
I joined the ends of the tube together, adjusting the polyfill inside as I went, and adding a little more near the end. (A big knitting needle is a great tool for this step.)
When the roll was sewn up, it needed to be rolled around and adjusted to improve the shape.
found that I hadn't made it quite big enough for my head, so I stretched it for a few days on a bucket.
I roughly measured and chalked where I wanted the lines of beads to go, and then started stringing. I used 4mm glass seed beads in white on a double strand of strong thread. I anchored one end of the thread, put all the beads on my string, and then sewed the other end into place. Then I came back through the centres of the beads with my thread again, anchoring it down with a stitch where I started. Then I went through and secured the main thread down between all the beads with a small stitch. I didn't extend the lines of beads all the way around because I find that my hair tends to catch and pull on beads.
The next step was to add the beads in the centre of the lines. I decided on three lots in each space, and three beads in each motif. I sewed each bead into place individually.
Checking the hat against the inspiration!
The finished product!
And views of the inside of the roll.
It is a very comfortable hat!